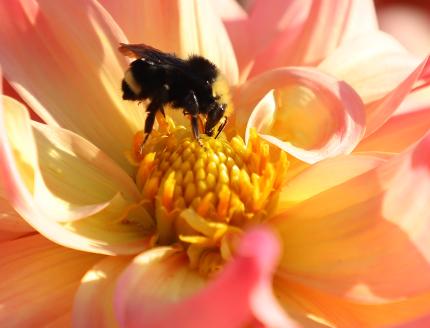
In cities and towns, greenspaces that provide pollinator habitat - such as parks, ravines, and greenbelts - are limited. We can help by creating pollinator habitat around our homes, businesses, and schools. This increases the connected habitats that allow pollinators to move through human-developed areas pollinating flowers, trees, and crops. Even small patches of habitat in window boxes, along sidewalks, and on porches give pollinators the opportunity to feed or rest.
Birds, bats, butterflies, moths, flies, beetles, wasps, small mammals, and bees can all be pollinators. They visit flowers to drink nectar or feed from pollen. Then, they move pollen between male and female plants, fertilizing the flower's eggs, which then produce seeds to create a new generation of plants.
While many animals act as pollinators, insects such as butterflies, moths, bees, flies, wasps, beetles and more do the bulk of the work. While some flies are considered agricultural pests, others are pollinators of apples, peppers, mangoes, and cashews. Beetles have been discovered to be one of the world's first pollinators and are still responsible for pollinating flowers like magnolia and water lilies. Even wasps can be pollinators!
While habitat needs can vary for different species, all pollinators need flowers, shelter, nesting areas, protection from pesticides, and people to advocate and work for them. You can support pollinators where you live, work, and play by providing food and water sources for cooling and creating nests. Watch this webinar from Xerces to learn all about Building Pollinator Habitat in Towns and Cities for the Pacific Northwest Region.
Download the pollinator toolkit (PDF) to get started at on a pollinator garden at your home.
Apply for our wildlife habitat certification program and sign. Our Habitat at Home program is free and open to all wildlife habitat types.
Apply for the Habitat at Home certification and sign
Download a printable application (PDF)

Native bees
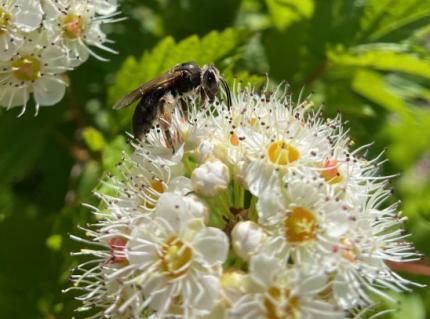
Honeybees might be the best-known species, but they make up a small fraction of the over 600 native bee species found in Washington. Honeybees are not native to Washington; they were imported from Europe to produce honey. Solitary bees like mason bees and carpenter bees make up 90% of our native bee species. These bees are generally non-aggressive and even stingless, calmly going about their important pollinating work.
Bumblebees are essential pollinators that can go about their work in cooler temperatures and lower light than other bees, making them able to work in higher elevation habitats such as our mountain ranges.
A bumblebee’s lifecycle is annual, meaning that a bumblebee nest is active for just one season. In the spring, a queen emerges from hibernation to forage and search for a nest location over the first few weeks. Generally, she is looking for cavity space in grasses or abandoned burrows, though they sometimes choose bird houses, insulation, and other human-made cavities. Bumblebees use existing spaces and do not dig or cause damage by chewing or eating.

Over the following month, queens gather food and build wax “pots” to fill with pollen and lay her eggs in. After the eggs hatch, larvae feed on the pollen and nectar provided by the queen and in four to five weeks will transform into adult bumblebees. Once the first group is past their feeding stage, the queen lays additional eggs. Bumblebee nests can grow to between 50 to 500 bumblebees in one season. In late summer, the queen and worker bees will begin to die off, and a newly-mated queen will build up fat reserves and find a location to overwinter as she hibernates.
- Found a bumblebee nest? Learn how to manage or protect it through the active season.
- Report a bumblebee nest to Bumblebee Watch.
Food
Plants have evolved different ways to be pollinated. Some plants are pollinated by wind, water, and through the actions of animals. Many plants have co-evolved with their main pollinators. This is apparent through the variety in flower types, shapes, colors, odors, nectars, and petal structure and how they benefit or attract different species of pollinators.
Having a wide range of pollinator species in an area can indicate that the area has high biodiversity which makes the area and its pollinators more resilient to environmental stressors like adverse weather or extreme temperatures. To have a wide variety of pollinators, we need to create a diverse landscape of flowers so all pollinators can find their ideal blooms.
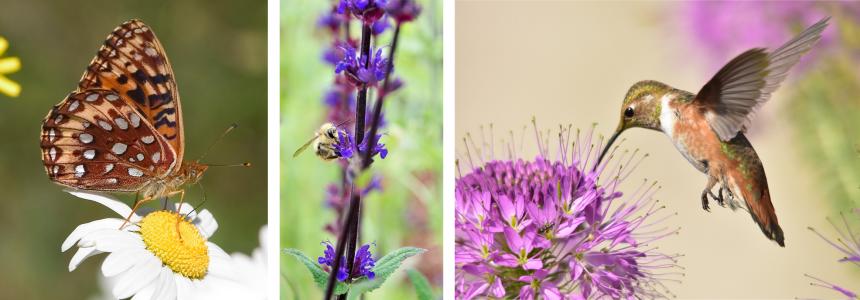
The other important element to consider when providing food to pollinators is bloom time. Plants evolved to have staggered blooming times primarily throughout the spring, summer, and early fall to reduce competition for pollinators. By reflecting this in your own planting choices, you can provide food for pollinators for a longer period. When choosing plants or seeds, choose plants with varying bloom times or flower seasons to diversify the flowers available to pollinators in your area. This will allow pollinators to be active in your space for a longer time. The resources below all include this information on their plant lists.
- Pacific Lowland Mixed Forest Province (PDF) (Western Washington)
- Cascade Mixed Forest Coniferous Forest Alpine Meadow Province (PDF) (Inland Washington)
- Northern Rocky Mountain Forest–Steppe Coniferous Forest Alpine Meadow Province (PDF) (Eastern Washington)
Water
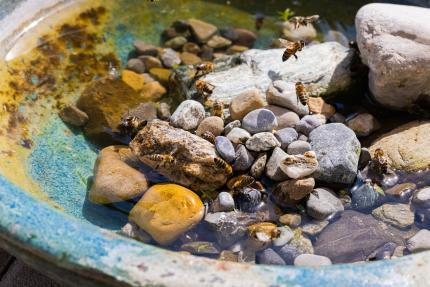
When temperatures are high, water evaporates quickly from leaves and flowers. Pollinators use water sources to drink, cool nests, or get minerals. During this time, pollinators such as bees and butterflies will often use water dishes or shallow bird baths.
Insect watering dish: In a shallow dish, place a variety of stones of various sizes. Fill the dish with an inch of water. The stones allow insects and small birds to land and drink safely. Drain completely and replace water every two to three days to keep it clean and avoid mosquitoes. Providing one of these water sources will benefit pollinators:
- Birdbath or shallow water source with stones to keep insects from drowning
- Butterfly puddling area
- Water garden or pond
- Local spring
- Natural body of water, such as a lake or river
Shelter & Space
Bumblebees typically nest at the base of bunch grasses in old mouse holes or the cavities of trees. Dead wood provides nesting habitat for a variety of pollinators such as bees, wasps, beetles, and ants. Many solitary bees will nest in the pith of stems and twigs. There are also a lot of ground-nesting bees who just need open, undisturbed ground. You can also create human-made nesting sites. For example, bee-nesting blocks can be made from an untreated wood block by drilling several holes approximately 1/4 inches in diameter and three to five inches deep.
Overwintering
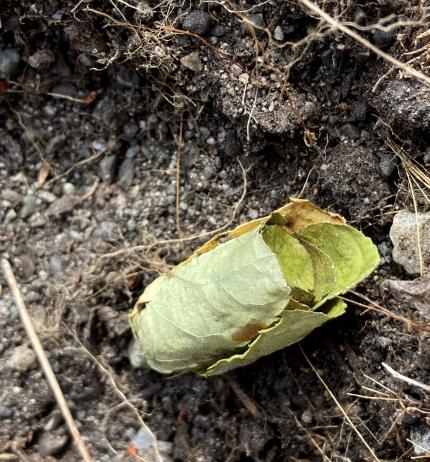
Pollinators need protection for overwintering. Instead of cleaning plant debris out of your garden in the fall, wait until spring, and let the debris provide a place for pollinators to spend the winter. Leaving undisturbed area such as leaf piles and other plant debris may help insulate the ground where bumblebees and other bees are overwintering.
Only newly-mated bumble bees survive winter. In late winter or early spring, queen bumblebees emerge to feed on floral nectar, collect pollen, and search for suitable nest sites to begin their colonies. Queens will search for an above or below-ground nest site which includes safe, dry cavities. Bumblebees might use a downed log, stump, abandoned rodent nest, or you may even find bumblebees starting a nest in abandoned bird nest hanging in your backyard.
Western bumblebees are in decline, in part due to warmer temperatures causing reduced snowpack, earlier snowmelt, and a later first frost - all of which likely disrupt the timing of the bumblebee's life cycle.
You can support bumblebees and other beneficial insects by providing overwintering habitat and adapting your yardwork practices. Many bees create small nests beneath the soil, inside dead plant stems, or in cavities in wood. By not removing plant debris, dead flower stems, and fallen logs from your yard, you can create winter habitat at home. Be sure to leave these elements alone until early spring, generally through April, to give overwintering insects time to emerge. Cleaning up too early in the season could leave pollinators waking up in the yard waste bin!
Provide these habitat elements to help pollinators survive the winter:
- Spaces of bare ground
- Rock pile or wall
- Dead wood including sticks and branches
- Leaf litter
- Hollow stems of dead flowers and plants
- Plant more flowers and groundcovers, less lawn grass
- Limit yard clean-up until late spring to let pollinators and beneficial insects emerge
Bee houses
Providing a bee hotel can be a great way to support native bees in your area. Bee hotels are structures with holes and hollowed out stems where cavity-nesting bees can rest and reproduce. In Washington, solitary bee hotels will attract bees like mason bees, leaf cutter bees, and carder bees. Place your bee hotel away from areas that receive heavy traffic like doorways or paths.
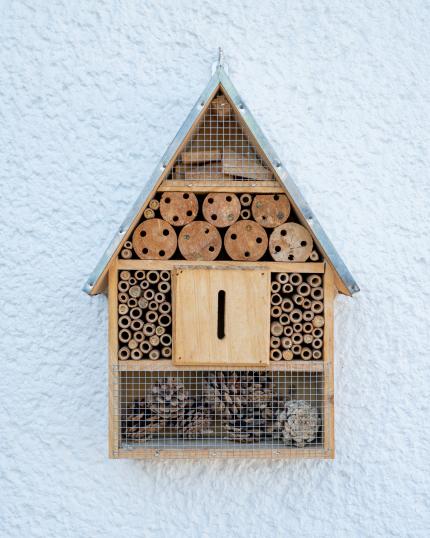
Use untreated wood to construct your house, if possible, but you can also use found items around your home like PVC pipe, milk cartons, or a plastic bucket. Cavity-nesting bees build their nests inside small hollow areas. Mason bees prefer 8 mm holes, and leaf cutter bees prefer 6 mm holes, so including a variety of tube sizes will support more species. When making or finding your tubes, avoid bamboo stems because they are too difficult to open and clean. Instead, use hollow stems found in nature, or make your own using paper that can be easily unrolled for cleaning. Wood trays designed for bee hotels also work great and are easy to open and clean.
Mount your bee hotel securely to a post, tree, or house in an area that receives morning sunlight. Bees need heat to become active and signal them to start their day. Many bees only travel about 300 feet a day, so place your house near nectar-rich flowers and a place they can find mud and clay for creating their nests.
In Washington, crows and other birds can learn to prey on bee hotels. Ideally, the length of the tubes will be about 1-1 ½ inches shorter than the front edge of the outer container to prevent birds from accessing the insects inside. Put a chicken wire screen with 1-inch openings across the front of the bee hotel so birds cannot get to the tubes, but bees can come and go freely. If ants are a problem, put a slick metal or plastic guard below the hotel so they can’t reach it. If spiders move in or surround the hotel, move it to a sunnier spot.
Mason bee hotels need vigilance, care, and maintenance that extend past putting up a bee box. During the winter months, you need to open the tubes, carefully remove and relocate the bee cocoons, and clean out or replace the tubes. Watch these videos from OSU Master Gardeners and Oregon Metro to learn how to annually maintain your bee hotel.
One of the best things you can do is adjust your gardening practices to increase nesting habitat for pollinators. Instead of raking leaves as soon as they fall, leave them in natural spaces. Remove them from walkways and place the excess leaves at the base of trees. When flowers die at the end of the season, trim off the heads but leave the stems attached.
Butterflies & moths

Watching butterflies and moths is a fun and rewarding way to connect with nature at home. Flying requires great amounts of energy so it is important for these species to locate high-energy food such as nectar-producing flowers. One insect may visit several different nectar-producing flowers, while another might visit a single bloom on a plant. All this diverse activity feeds the insects and increases the strength of the plants.
Colorful groupings will help attract butterflies, while light-colored blooms and fragrant plants will bring in nocturnal pollinators.
Did you know there are 10 times as many moth species as butterflies in Washington? Overall, 19% of moth and butterfly species are at risk of extinction.
Comparing butterflies and moths
Butterflies
- Diurnal (active during the day)
- Often brightly colored
- Antennae is knobbed at the ends, not feathery
- No silky cocoons around pupa
Moths
- Active both during the day (diurnal) and at night (nocturnal)
- Less colorful (some exceptions)
- Feathery antennae without knobs
- Silky cocoons around pupa
Moths are great nocturnal and diurnal garden visitors that are worth observing. Adult sphinx moths, such as the White-lined Shinx (Hyles lineata) extract nectar from deep-throated, fragrant flowers that open their blooms at night and during the day. These insects hover in flight like hummingbirds, using their long tongues like a straw to sip nectar. Moth larvae feed on a variety of plants native to Washington including alders, apples, grapes, willow, snowberry, and cherry. Of the 6,000 moth species in North America, there are only two species that favor fabrics like wool and carpet more than plants.

Plants that benefit moths and butterflies
- Inland Northwest (PDF) (Eastern Washington)
- Maritime Northwest (PDF) (Western Washington)
Identifying butterflies and moths
- Common Butterflies of Puget Sound (PDF)
- Guide to Butterflies of South Puget Sound (PDF)
- Eastern Washington Butterflies
- Pacific Northwest Moths
Food
Butterflies use the sun to navigate and to increase their body temperature, which is needed for flight. Therefore, it is important to choose a sunny spot for your butterfly-friendly plants. Also keep in mind that butterflies don’t do well in the wind, so find a protected spot for your flowers.
Brightly colored, fragrant plants are attractive to butterflies. Plants with flat flower heads that contain small multiple florets, such as those found on asters, furnish butterflies with landing pads. Here, butterflies can rest and sip nectar while pollinating the plants. Strive to choose flowers that bloom across the spring and summer, to provide food while pollinators are active.
To support butterflies and moths, provide breeding and larval (caterpillar) feeding grounds. Reproductive females are most successful if they don’t have to travel far from their feeding grounds to find the right host plant to lay their eggs. A host plant is the specific plant that is eaten by their young because it meets the caterpillar’s nutritional needs once they hatch from their eggs. This relationship is so strong, that caterpillars will starve to death if they cannot find their exact host plant.
You can support butterflies by planting groups of host plants together near nectar so females can locate them. Since caterpillars are veracious eaters and may consume much of the host plants, choose your planting location accordingly.
- Download your free planting guide based on your zip code from our friends at the Pollinator Partnership.
- Download the Attracting Pollinators to Your Garden booklet from the U.S. Fish and Wildlife Service.

Water
Wet sand and soil provide butterflies with trace minerals they need that are not found in nectar.
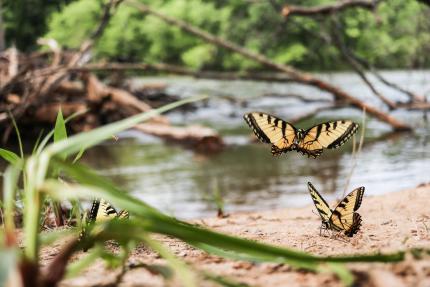
Puddling Dishes are used by butterflies to drink water and extract minerals. Fill a shallow dish with a mix of sand, soil, or compost. Add water to create mud. Place the dish either in the ground or higher on a flat surface. Check often to keep it moist. Avoid overfilling to keep standing water from sitting and attracting mosquitoes.
Puddling areas are created in the ground without the need of a dish. Slightly muddy areas work, such as those under birdbaths or near drain spouts. Butterflies will also gather and use shallow pools, river and stream banks, or even birdbaths if they can safely access the water. In any homemade containers, be sure to change the water two to three times a week to prevent mosquitos from breeding.
Shelter
Butterflies need our leaf litter and natural spaces. Overzealous fall and spring yard cleaning can remove the items butterflies and moths need most. Leave snags (standing dead trees), downed logs and wood, thick undergrowth, and leaf and brush piles. These spaces allow them to survive the winter and hatch in the spring. Similarly, many butterfly species seek shelter among weeds and tall grasses at night and during bad weather.
Hummingbirds

Washington is home to four species of hummingbirds - Rufous and Anna’s west of the cascades, and the Rufous, Calliope, and the occasional Black-chinned east of the Cascades. While Anna’s hummingbirds are found year-round utilizing artificial hummingbird feeders, the others usually arrive by May and leave our state by October.
Named for the “whir” their wings make, hummingbirds average 70 to 80 wing beats per second.
Hummingbirds are small - just 3 to 4 inches long and weighing no more than a nickel - but they expend more energy than any other animal in the world. With an average speed of 27 miles an hour, they can reach speeds of 50 mph when beating their wings up to 200 times a second.
Nests
Hummingbirds prefer to make nests in low tree branches and bushes. Females construct golf ball-sized nests using plants, moss, and lichens held together by spider webbing. These nests are very susceptible to early spring pruning, which can expose or destroy nests if you aren’t careful.
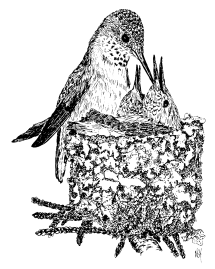
Hummingbirds are very vocal when agitated, so be aware of aggressive hummingbirds and look carefully for nests in areas that are being defended.
Eggs & Chicks
Female hummingbirds lay two pea-sized eggs and incubate them for 14 to21 days. Once hatched, young are fed a rich diet of regurgitated nectar. After 25 days, young hummingbirds leave the nest to survive on their own.
Food
Hummingbirds eat flower nectar for instant energy and get protein from eating aphids, small insects, and spiders. They can eat more than half their weight in food and drink eight times their weight in water every day. In Washington’s cooler climates, hummingbirds will gather extra food into their crop before dark each night, and digest that stored food throughout the night. They lower both their body temperature and heart rate at night (this is called torpor) to conserve energy.
Hummingbirds are attracted to bright red, orange or red-orange tubular-shaped blossoms or nectar-rich plants. They prefer single-flower blossoms because they have more nectar than double-flowered ones. Hummingbirds need more than flowers, so include native trees, bushes and vines in your landscape to create a low maintenance landscape that can support hummingbirds and other pollinators. Select plants that grow to be two feet and taller for the best feeding locations. Even potted and container plants will benefit hummingbirds, if you pick the right blooms.
Feeders
When choosing a feeder, choose multi-station feeders over glass tubes or spouts, and always choose feeders that come apart easily so they can be cleaned thoroughly. Mold and bacteria will spoil your sugar solution after just a couple of days of hanging in warm weather.
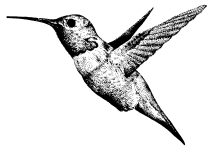
Clean feeders and change out your sugar solutions every four to five days, and more often in warmer weather. Clean them thoroughly with a brush, hot water, and vinegar to discourage mold. If you do not have time to clean and maintain feeders, do not hang them out for birds; instead, rely on plants to feed hummingbirds. Poorly cleaned and maintained feeders are a serious hazard to the birds’ health.
Feeder solutions with dye or food coloring (often red) is unnecessary and unsafe for hummingbirds. Make sure solutions you buy or make are no more than 1 part sugar to 4 parts water to avoid fatal hardening of the liver. Never use honey or artificial sweeteners.
The best location for a feeder is in a place where you can easily monitor and clean it. Shady spots keep the solution cool and help decrease mold growth. Plant or hang other nectar-producing blooms near feeders so hummingbirds will have natural nectar and insects nearby for a better-balanced diet.
Keeping pollinators safe
Pesticides
Pesticides are a huge topic in the discussion about worldwide insect declines. Pesticides not only impact pest insects, but also harm beneficial insects that control other pests and pollinators. Pesticide use can severely impact caterpillars, which provide an essential food for birds and grow into many of our main pollinators such as butterflies and moths. Losses of predatory insects such as wasps and ladybugs can impact the balance of the local habitat and your garden.
Impacts of pesticide use can continue impacting pollinators in the environment for weeks to years after use. Even pesticides claiming to be “safe,” “natural” or “organic” are toxic to certain insects or in certain environments. All pesticides, which include herbicides and insecticides, harm pollinators and beneficial insects.
Pollinator-safe plants
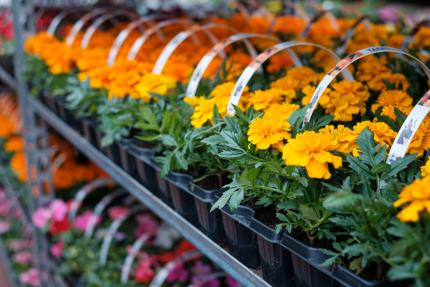
Pyrethroids and neonicotinoids are insecticides that claim to be safe for mammals but can still be devastating for pollinators. These insecticides can end up in plant nectar and can kill pollinators, even if they were treated at the nursery or as seeds.
When buying plants (PDF) at local nurseries, be sure to check all labels and talk to staff to be sure the plant you are taking home has not been treated with any pesticides. Check labels for terms like: Acetamiprid, Clothianidin, Dinotefuran, Imidacloprid, and Thiamethoxam. Sometimes, pesticide-free plants are not available at nearby nurseries. If so, advocate for pollinators by asking questions, requesting pollinator-safe options, and providing information for them to consider. The more people that care about these issues, the more likely businesses are to support the needs of their community and search out pollinator-safe plants. For more on how to help advocate for pollinators, watch this webinar from The Xerces Society.
Remember that plants are resilient, and insects are a natural part of our environment. Damage on plants from insects does not necessarily mean that the plant is in trouble. Avoiding pesticides and allowing nature to find its balance can lead to a healthier garden in the long run.
Mosquito control
If mosquitoes are your biggest concern, there are safer ways to reduce their numbers than using insecticide. Focus on reducing areas where mosquitos can breed. Mosquitoes can breed in as little as one inch of standing water, and leaving standing water for even a week can lead to an explosion of mosquitos. Look for places where water can pool such as buckets, trash cans, flowerpots, pet bowls, bird baths, and clogged gutters. Dump and refill these every few days to prevent mosquito larva.
For permanent water sources, add a fountain or small pump to keep the water moving. For more guidance, check out the Xerces Society's information on managing backyard ponds for dragonflies and damselflies. (PDF) Talk with your neighbors about techniques that keep mosquito populations down in your community and reach out to local municipalities about standing water on public land.
Lawns
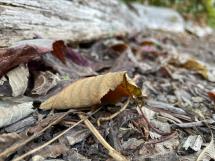
If you haven’t or aren’t able to reduce your grass lawn, there are some other ways to still help pollinators. Spread a thin layer of leaves over your lawn in the fall and leave it there through early spring. This added insulation layer helps overwintering insects stay protected from harsh weather.
Skip the early season mowing to allow hibernating pollinators to emerge once the weather is warm enough. Hold off mowing in March and April and wait through May if you can. When you do mow, set your blade to at least three inches so you don’t damage nests or later-emerging cocoons.
Community science
Many Washington pollinators are endangered or at risk. You can help protect pollinators by observing pollinators in your area and contributing photos to community science projects. Take a picture of what you see and upload it to iNaturalist where the community will help identify and confirm your sightings. Researchers can access this data from the public to learn more about populations and range of pollinators.
Bumblebee Watch
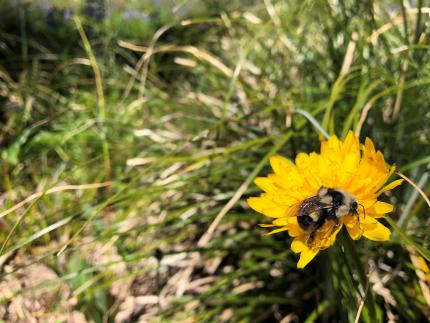
Scientists across North America are working together to study nearly 50 species of bumble bees and why their populations are declining. Causes likely include loss of habitat, pesticide use, climate change, and competition with honeybees.
Scientists need a better understanding of where bumble bees are to help protect them. You can help them by sharing photos of bumble bees you find in your yard and neighborhood.
Gather your materials:
- Camera or phone
- Computer
- Clear container like a mason jar (optional)
Instructions:
- Download the free Bumble Bee Watch app (App Store / Google Play) or create a Bumble Bee Watch account from your computer.
- Take a photo of a bumble bee. It can be hard to photograph a moving bee so try waiting near an open flower for a bee to land. Then take several photos from different angles so you can identify the bee later. Collecting bees in a clear jar allows you to take close up photos, but be sure to release it afterward. Check out these additional tips for photographing bees.
- Log in to your account and upload your photo (Watch this 9-minute step-by-step video for help).
- The website will help you determine which species of bumble bee you observed. Do your best to identify the bumble bee based on its markings. Your sighting will be verified by an expert.
Get involved in community science: Butterflies and Moths of Washington
Activities at home
Observing butterflies and other pollinators is a great activity that is accessible to everyone, right where they live. You can visit beautiful butterfly gardens at places like Woodland Park Zoo or the Capitol Pollinator Gardens in Olympia, or look for these pollinators in your own backyard.
No equipment is needed to observe butterflies, though you can get close focus binoculars (10x26) if you want a closer look that won’t disturb them. Butterfly observations are best on a sunny day. Look for bunches of colorful or fragment plants for a good starting place. These butterfly ID guides for eastern Washington or the South Puget Sound (PDF) can help you figure out who you are observing! You can also connect with other butterfly enthusiasts in the state through the Washington Butterfly Association.
Create basking spots for butterflies
Butterflies warm their blood and flight muscles by basking with their wings open and bodies perpendicular to the sun. Place a few stones or rocks facing south to create butterfly basking sites. Place them near bright colored or fragrant flowers where butterflies feed.
Make a moth trap
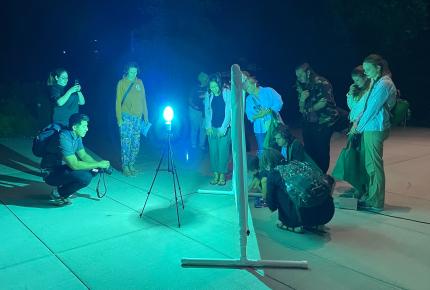
Moths are an important part of the biodiversity of our state. They pollinate many of our state’s plants and flowers, while caterpillars are essential food source for songbirds and their babies. You can experience moths at home by making a moth observation sheet. Hang a white sheet on a line or the side of a building after dark, then shine the light on it. Wait for the moths to come to your light so you can observe and photograph them!
Create a pollinator garden
When flowers are blooming, pollinators are busy searching for pollen. You can help by creating more pollinator habitat with a pollinator garden of any size. Have you noticed plants in your yard that seem to attract a specific pollinator? Do you know what type of plant it is? Learning which plants are already in your yard will help you add complimentary plants to support even more pollinators.
There are many resources to help you identify plants. Your family may already have plant identification books. There are also many online resources such as Washington Native Plant Society and apps like iNaturalist to help you identify plants. Learn more about pollinators, planning a pollinating garden by starting with these activities from Woodland Park Zoo. Once you’ve identified what you already have, you can begin planning additional pollinator-friendly plants to add to your yard.

Gather your materials:
- Paper and pencil
- Gloves
- Water
- Compost
- Native plants or seeds
Instructions:
- Pick a location. Pollinators enjoy sunshine and some of their favorite flowers grow in full sun or partial shade. They also prefer protection from the wind. Mark these locations on your landscape design.
- Assess your soil. Some plants prefer sandy, well-drained soil, others prefer wetter soil that is more like clay. Dig in and feel the grains between your fingers. Sandy soils will feel gritty and will fall through your fingers. Clay soils will feel smooth and sticky when wet.
- Choose native plants. Get the most out of your efforts by choosing native, perennial plants. Perennials return each year and native varieties require less maintenance and are heartier. Include plants that bloom at different times of the year, from spring to fall.
- Prepare your space. Remove grass or other plant covers, create a raised bed, or add soil to patio pots. Add some compost or nutrient-rich soil to help your plants grow.
- Plant flowers or seeds. Follow frost guidance to avoid putting small plants in the ground too early. When risk of frost is gone, dig a hole just large enough for the root ball. Add extra compost and water regularly. Seeds need time to germinate and may need to go out in fall or winter; follow packet instructions.
- Maintain and enjoy. Make sure to water and weed your pollinator garden. The bees, butterflies, and other pollinators will thank you by visiting your flowers!
Learn to identify bumble bees
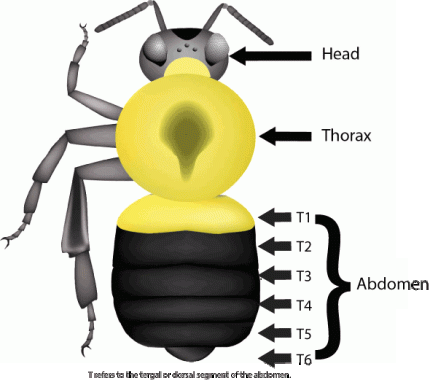
When you think of a bumble bee, do you picture the iconic yellow and black stripes? Most bumble bees have those black and white stripes, but they can also have white, red, and orange coloring. Like all insects, bumble bees have three main body parts: head, thorax, and abdomen. The coloration of these parts is used to identify bumble bee species. With careful observation, you can learn to identify the different species of bumble bees in your backyard.
Gather your materials:
- Camera or phone
- Pacific Northwest Bumble Bees Guide (PDF)
- Clear container like a mason jar (optional)
Instructions:
- Take photos of a bumble bee. Try waiting near an open flower for a bee to land. Then take several photos from different angles. This will help you identify the bee later. Check out these additional tips for photographing bees from our friends at Bumble Bee Watch.
- If you feel comfortable, try collecting the bumble bee in a clear container to take close up photos. Then release the bee so it can continue its important pollination work.
- Using the Pacific Northwest Bumble Bees guide, look to see if your bee resembles any of the common bees in Washington. Remember to look at the coloration of the head, thorax, and abdomen.
- After identifying your bee, you can use the Bumble Bee Watch species website to learn the types of flowers it prefers, how large its range is, and when you can expect to see it each year.
